A step-by-step guide for members
This page describes how to acces and use the member section of the Association’s website back office in order to:
– update your profile (contact information, logo, photos, etc),
– post information about your organisation’s activities or about machines and other historical printing equipment in the News and Machines sections of the website.
To do this you need a user name and a password.
The information which you post is moderated by the AEPM webmaster.
Logging in to the AEPM website
To log into the member section of the back office, use the “Member login” function which can be found at the bottom right-hand corner of any page of the AEPM website.
A dialogue box will open:
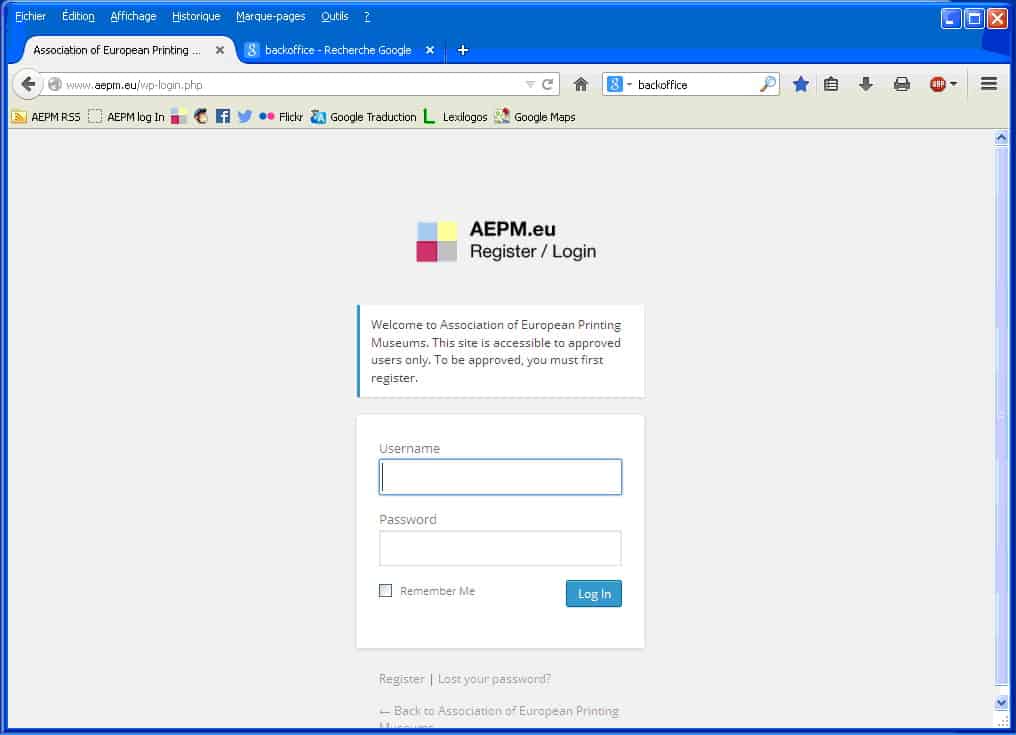
Enter the user name and password which you received when you or your organisation became a member of the Association.
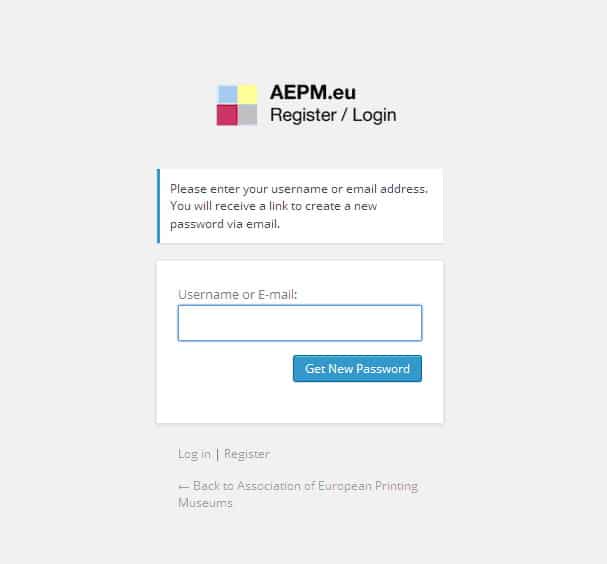
Lost you user name and/or password?
If you have lost or forgotten your user name, please contact webmaster@aepm.eu who will send it to you with a new password.
If you know your user name but have lost or forgotten you password, please use the “Lost your password?” function in the member login dialogue box. You can access this at any time using the “Member login” function which appears at the bottom right-hand corner of all pages of the AEPM website.
In this case udicate your user name or email address. An email will be sent to you automatically indicating how to reset your password.
Member dashboard
Once logged in you will see the Member dashboard.
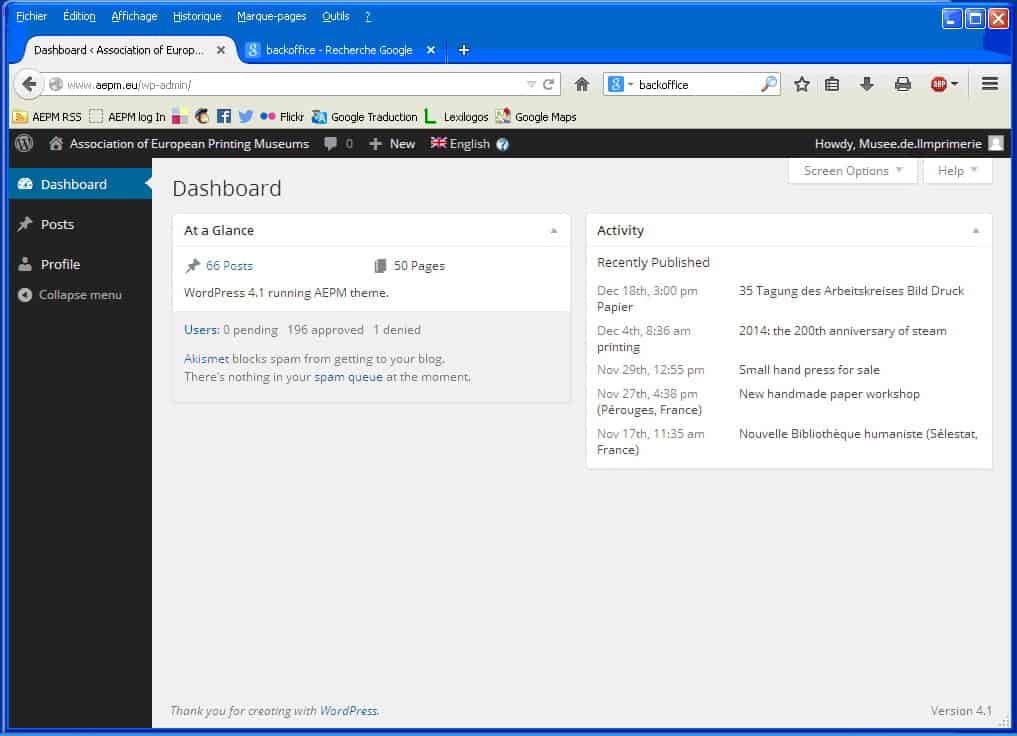
The Member dashboard offers two options: “Posts” and “Profile”.
Selecting the “Posts” option allows you to consult your existing posts or add a new one.
The “Add new” option allows you to add a new post.
“Posts” option
Hover over Posts and select one of the two following options:
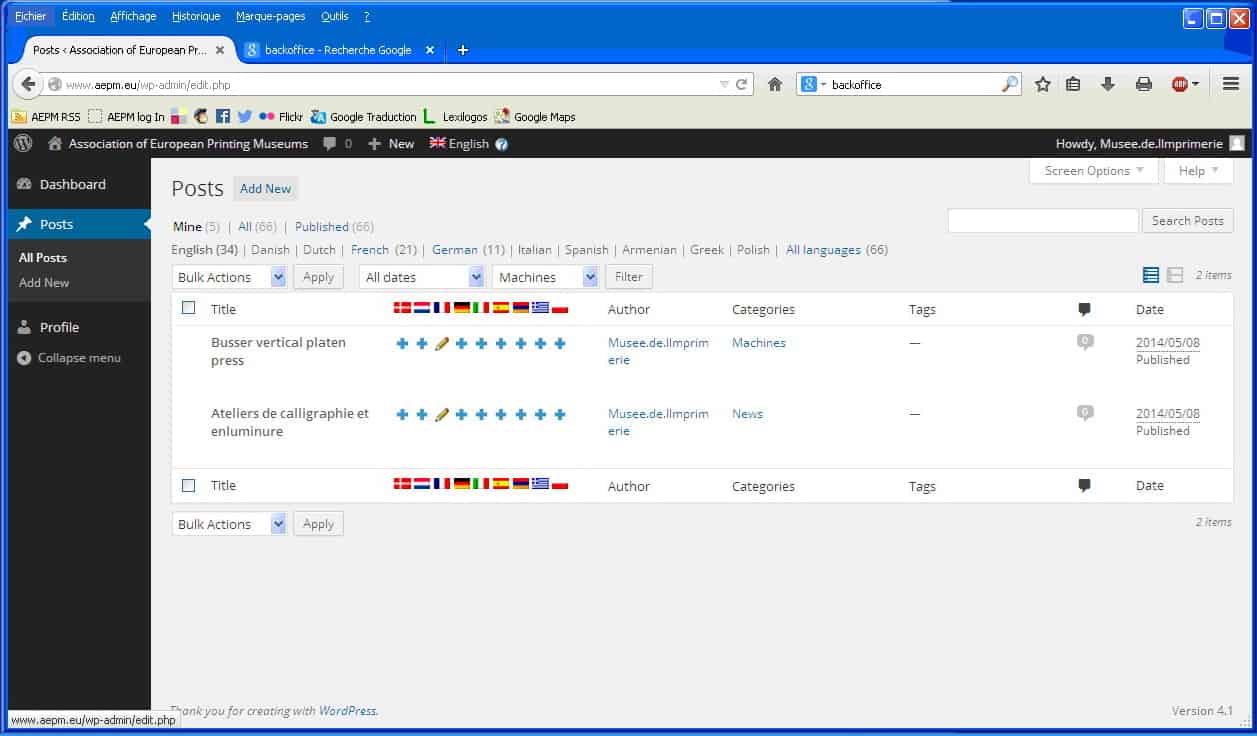
- “All posts” : this will show you the list of all your organisation’s existing posts, the language(s) in which it has been published, and the category to which it belongs (News or Machines).
- The “All” option at the top of the screen allows you to view all the posts which have been published on the AEPM website. You can also display posts by language by clicking on the appropriate option.
“Add new”: this allows you create a new post which you will later be able to attribute to the News or the Machines section.
Your cannot edit posts which you have already published or other members’ posts. Neither can other members edit your posts.
The screen is made up of several boxes:
- “Enter title here” is where you enter the title of your post.
- The large empty box beneath the toolbar is where you enter the main text of you post. It can be as long (within reason) or as short as you like.
- “Meeting options”: allows you to indicate, if appropriate, the place and date(s) concerned by your post.

Text editing tools
The toolbar offers the standard editing functions: bold and italic text, small capitals, lists, flush left, right and centred text, links to URLs, title and standard paragraph styles, etc.
You can include images (jpeg only, 72 dpi) in your post. To do this use the “Add media” function above the format tool bar. You can select an existing image from the media libary or upload an image from your computer.
Right-hand menu options
Language
Choose the language of your post. If you have translation capabilities, you can repeat your post in several languages (French, German, English, Italian). The existence of two of more language versions is indicated in the main list of posts.
Publish
Save draft: you can save your post-in-progress at any time and continue editing.
Preview: allow you to preview your post-in-progress in a new navigator window and check the result of corrections, format changes, etc., as you edit.
Categories: for your post to be displayed on the site you must choose a category (Machines or News).
Tags: please ignore. the function is not operational for the moment.
Featured image
(This function only applies to pages, it does not apply to posts.)
You can include an image in the banner at the top of a page. To do this use the Add media function above the format tool bar. You can select an image from the Media libary or upload an image from your computer.
Featured images (jpeg) for display at the top of a page should be uploaded at a minimum resolution of W 625 pixels by H 188 pixels, at 72 dpi.
To add media to a post
On the page showing the post currently being edited:
– select Add media (near the top left-hand corner of screen).
The tabs in the upper left-hand corner of the central frame of the screen offer two possibilities:
- Upload files
This option allows you to upload media (images, pdfs) from your own computer.
To do this place the the cursor at the point where you want the image to appear.
Click on the Upload files tab.
The Select files button in the centre of the screen will take you to your local hard drive where you can select a file (image or other media) to upload to the AEPM media library.
The file may take a moment to upload, so be patient.
Once the file is uploaded, you can give it a caption by filling in the Caption field. The caption will display under the image once it has been inserted into the page.
Then click on Insert into post button (bottom right-hand corner).
You will be automatically returned to the editing page in which the new image will be displayed.
- Media library
This option allows you to insert an image (or other media) already present in the website’s Media library.
To do this place the cursor at the point where you want the image to appear.
Click on the Media library tab.
In the window which opens, choose an existing image or document from the media library.
Then click on Insert into post button (bottom right-hand corner)
In both cases you can edit the information concerning the media: its Title (which does not show publicly), the Caption which will appear publicly beneath the image, and a description (which will also appear publicly).
This can be done before inserting the media into the page.
If you wish to change information after insertion, go to the Media library, select the image in question, edit the information and simply close the page (using the X at the top right-hand corner) without using the Insert into post function. N.b. The changes will affect all existing uses of the image in other posts or pages.
Protecting email addresses from spam
The inclusion of email addresses does not require any special precautions: they can be written in their normal form. A WordPress plug-in protects them from unwanted spammers.
Moderation
Before being published on-line, all posts are moderated by the AEPM webmaster.
Profile
Hover over “Profile” and click to select.
Various options allow you to change/customise your password (you can’t change your User identity which is allocated by the system), add or change information concerning your organisation and two images to represent it visually
Once you have finished your changes, don’t forget to save them by clicking on “Update information”. As soon as your post has been moderated it will be displayed in the public section of the AEPM website.